Installing solar panels on your house typically takes several weeks from start to finish. First, you’ll have an initial consultation to discuss energy needs and costs. Then, a site assessment will inspect your roof and analyze shading. After that, a custom system design takes place. The permitting process can take 1 to 4 weeks, depending on local regulations. On installation day, the crew efficiently mounts the panels. Finally, inspections and utility approvals take a few more days to complete. This might seem like a lot, but each step guarantees a successful solar panel setup. Keep going to understand each stage better!
Initial Consultation
Your first step in installing solar panels is scheduling an initial consultation with a reputable solar provider. During this meeting, you’ll discuss your energy requirements, which is essential for determining the right system for your home. The provider will gather information about your current electricity usage, which helps them calculate how much solar energy you’ll need to generate. If you reside in Dundee, it’s beneficial to look into experienced solar panel installers Dundee residents trust, as they can offer tailored insights and local expertise.
Additionally, you’ll receive detailed cost estimates. These estimates cover everything from the price of the solar panels themselves to installation fees and potential maintenance costs. Understanding the financial aspect upfront allows you to plan your budget effectively and explore any financing options or incentivesthat may be available.
It’s also a great opportunity to ask questions and clarify any concerns you might’ve about the installation process or the technology involved. The provider will explain how solar energy works, the benefits you can expect, and what kind of savings you’ll see on your electricity bills.
This initial consultation sets the stage for a successful solar panel installation by ensuring you’re well-informed and prepared for the next steps.
Site Assessment
After the initial consultation, the next essential step is conducting a thorough site assessment to evaluate the suitability of your property for solar panel installation. This assessment guarantees that your home can support a solar energy system efficiently and safely. Here’s what you can expect during this phase:
- Roof Condition: An expert will inspect your roof’s condition to determine if it can hold the solar panels. They’ll look for signs of wear and tear, structural issues, and the age of the roofing materials. If your roof needs repairs or replacement, you’ll want to address that before moving forward.
- Shading Analysis: Proper sunlight exposure is important for solar panels to function at their best. A shading analysis involves checking for any obstructions like trees, chimneys, or nearby buildings that could cast shadows on your roof. The goal is to identify and mitigate potential shading issues to ensure maximum sunlight absorption.
- Orientation and Tilt: The angle and direction of your roof affect how much sunlight your panels can capture. The assessor will measure the tilt and orientation to determine the best placement for the panels. South-facing roofs usually offer the most efficient solar energy capture.
This site assessment phase typically takes a few hours to complete, but it’s essential for a successful solar installation.
System Design
Designing your solar energy system involves creating a detailed plan that guarantees peak performance and efficiency tailored to your specific needs. First, your installer will consider your energy consumption patterns. They’ll look at your past utility bills to estimate how much power you need and design a system that meets those requirements. Custom solutions are key here; every household has unique energy needs, roof configurations, and shading issues.
During the design phase, a multitude of factors come into play. Design considerations include the orientation and tilt of your roof, which affect how much sunlight your panels can capture. The installer will also evaluate the structural integrity of your roof to ensure it can support the weight of the panels. They may use advanced software to simulate the performance of different panel configurations and optimize the layout.
Additionally, they’ll plan the electrical setup, determining how to connect your new solar system to your existing wiring and the grid. This phase is essential for ensuring safety and compliance with local codes.
Permitting Process
Understanding the permitting process is essential to guarantee your solar panel installation complies with all local regulations and codes. You can’t just start installing solar panels without the proper permits, and navigating this process can initially seem challenging. However, breaking it down into manageable steps can make it much easier.
Firstly, you’ll need to gather the necessary application forms for your local building department. These forms will require detailed information about your proposed solar system, including design specs and site plans.
Secondly, you should be prepared to pay permit fees. These fees can vary widely depending on your location, so it’s a good idea to check with your local authorities to get a clear understanding of the costs involved.
Thirdly, submit your completed application forms and fees to the appropriate local agency. They’ll review your documents to make sure everything meets the required standards and codes. This review process can take anywhere from a few days to several weeks, depending on the complexity of your project and the efficiency of your local permitting office.
Installation Day
On installation day, you’ll see the crew arrive early to set up their equipment and prepare your roof.
They’ll start by securely mounting the solar panels, ensuring everything is aligned correctly.
This process is efficient and well-coordinated, reflecting the professionalism of the installation team.
Arrival and Setup
As the installation team arrives, excitement and anticipation fill the air. You’ve been looking forward to this day, and now it’s finally here. The crew quickly gets to work, demonstrating their efficiency and expertise. Their first task is managing the crew logistics, guaranteeing everyone knows their role and what’s expected.
Next, they begin the equipment unloading process. This involves carefully removing the solar panels and other necessary components from their transport. They do so with precision to avoid any damage and to make certain everything is in order for the installation. You’ll notice them checking each item off an inventory list, confirming that nothing is missing.
Here’s a brief rundown of what happens during the arrival and setup phase:
- Crew Logistics: The team gathers to discuss roles and tasks for a smooth workflow.
- Equipment Unloading: Solar panels, inverters, and mounting hardware are carefully unloaded and checked.
- Site Preparation: The crew ensures your roof and surrounding area are ready for the installation.
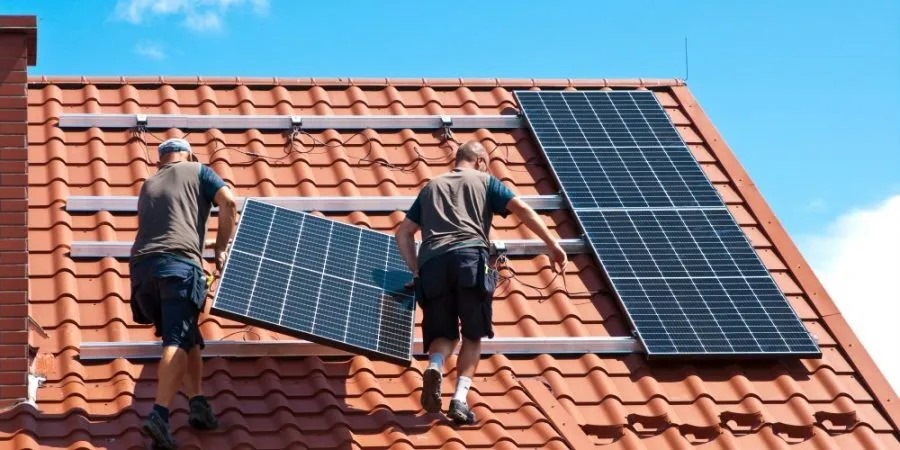
Panel Mounting Process
Once the setup is complete, the crew starts the panel mounting process by installing the racking system on your roof. This system is the backbone that supports your solar panels. First, they’ll assess your roof’s condition to make sure it’s ready for installation. Roof preparation might involve minor repairs or adjustments to ensure it can handle the mounting hardware.
Next, they’ll carefully measure and mark the spots where the racking system will be attached. Precision is vital here to guarantee ideal alignment and stability. Using specialized mounting hardware, the crew will secure the racking system to your roof, ensuring it’s firmly anchored and level.
After the racking system is in place, the actual solar panels are then mounted onto this framework. The team will handle each panel with care, connecting them to the racking system using bolts and clamps. They’ll make sure each panel is securely fastened and properly aligned for maximum exposure to sunlight.
Throughout the panel mounting process, safety protocols are strictly followed to prevent any damage to your roof or the panels. By the end of this phase, the racking system and panels are securely in place, ready for the next steps in your solar installation.